
I haven't had much time to blog lately. There are major renovations going on in my apartment complex, and it limits my free time. I wrote this up a while ago, but just now got around to making the screenshots and title image because I'm waiting for some guys to get here with my stove.
This tutorial came about after a conversation I had with someone on DA about the problem of watermarks that overpowered the image and were distracting. As an artist, I like to have a signature or watermark of some kind on my work, but it's sometimes difficult to do that in digital media. This is my favorite method of watermarking an image. It's really quick, takes two or three layers at most, and you can save your watermark for later use.

Difficulty: Beginner to intermediate. It's pretty easy, but I'm not going into as much explanation as I would in a beginner tutorial. Comments are welcome if you need help.
Translatable: PSP 7-9. Don't know about other programs or later versions.
Description: Here's a quick and easy way to place a watermark on your artwork that is visible but doesn't dominate or obscure the art. You can save your watermark with the picture tube tool in Paint Shop Pro so that you'll be able to add it quickly without having to open another file or copy-paste. Tubes are basically like rubber stamps for your computer. They can be scaled and resized automatically, and they work with any image that has a transparent background, so they're a lot more convenient than a folder full of PNGs
1. Open a new transparent document. The size will vary depending on the image you're using as a watermark. I recommend something small and simple for your watermark, like a signature, otherwise it will dominate the whole piece of art.
2. Place your watermark text or image at the center of the canvas. Use either black or white, otherwise you may get some weird color imprints in your watermark and you want it to be transparent.
3. Go to effects>Texture Effects>Emboss. Screenshot
Now what you'll see is something like this screenshot. I know it doesn't look transparent now, but it will.
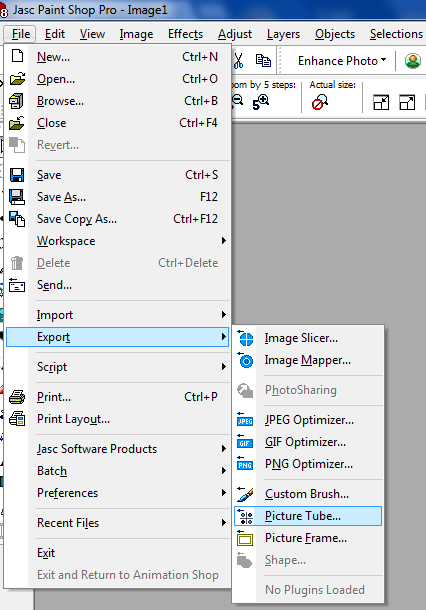
4. Go to File>Export>Picture Tube. Screenshot
A dialog box will come up. Give your watermark a name.
5. Now open an image that you want to put the watermark on.
6. Create a new raster layer. Name the new layer watermark if you want to. I find that naming the layers makes it easier to keep track, but it's personal preference.
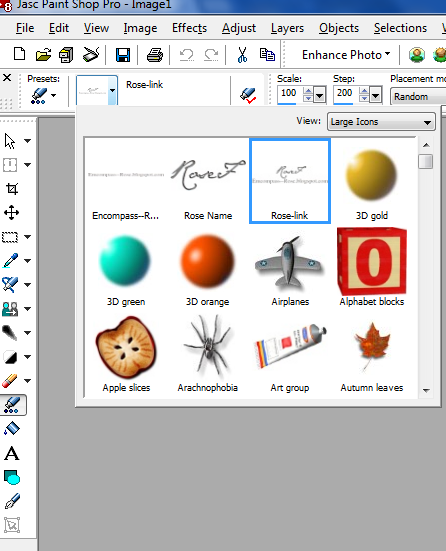
7a. Select the Picture Tube tool from the side toolbar. Screenshot.
In the top toolbar, you'll see a dropdown arrow. Click it and you'll see previews of all the tubes you have installed. Screenshot.
7b. Select your watermark from the dropdown menu and place it where you want it on the new layer. Remember, the tube tool works just like a rubber stamp, so if you put your watermark too close to the edge of your image, it will get cut off..
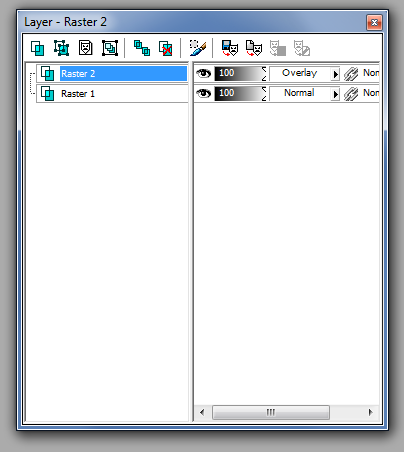
8. Now go to your layer palette and set the watermark layer to overlay. Screenshot.
You'll have something like this screenshot.
If it's too faint, then duplicate the layer and set it to screen. Then lower the opacity on your screen layer until you're satisfied with how the watermark looks.
And that's it. Happy watermarking!
If you found this tutorial useful, please consider making a donation. They're very much appreciated.
No comments:
Post a Comment